Finding elements on a web page
To do that, GTM provides the following two selection methods while configuring an ‘element visibility’ trigger:1. ID : Use the ID selector, if you have got only one type of HTML element to
find/track and that element has got the ‘ID’ attribute.

2. CSS Selector : Use the CSS selector, if you have got multiple HTML elements to
track and/or the element you want to find does not have the ‘ID’ attribute.
For example:
Here the element visibility trigger will fire only when all of the following
elements appear in a viewport:
1. the element with class =intro
2. <h1> element
3. <p> element

When to fire this trigger

You get the option ‘When to fire this trigger’ when you are setting up an ‘element visibility trigger’ in GTM:
#1 Once per page – Select this option if you want the element visibility trigger to fire only once on the current page when a matched element or one of the matched elements become visible in a viewport.
#2 Once per element – Select this option if you want the element visibility trigger to fire only once per matched element which becomes visible in a viewport.
Note: If multiple elements have the same ID attribute, only the first matched element will fire the trigger (unless it is subsequently removed by an observed DOM change).
#3 Every time an element appears on the screen – Select this option if you want the element visibility trigger to fire every time a matched element becomes visible in a viewport.
Minimum percent visible
‘Minimum percent visible’ is the minimum area of a matched element(s) that must visible in a viewport before the element visibility trigger fires.You set this option while setting up the element visibility trigger:

The default value of ‘Minimum percent visible’ is 50% i.e. at least 50% of a matched element(s) must appear in a viewport before the element visibility trigger fires.
Minimum on-screen duration
Minimum on-screen duration is the minimum amount of time (measured in milliseconds) for which a selected element(s) must remain visible in a viewport.You set this option while setting up the element visibility trigger:

Observe DOM changes
You set this option while setting up the element visibility trigger:
Here you are telling GTM to fire the element visibility trigger only when there is some change in DOM.
A DOM changes whenever new element(s) are dynamically added to DOM or existing element(s) are dynamically removed from DOM.
Use case for element visibility trigger
To accomplish this task, follow the steps below:Step-1: Navigate to one of the blog post pages, say: https://www.optimizesmart.com/video-tracking-viayoutube-video-trigger-google-tag-manager/
Step-2: Scroll down the page unless you see the following banner ad:

Now I need to capture the element(s) which is the banner ad. I can do that by finding the CSS selector
of this element.
Step-3: Install the chrome extension called ‘SelectorGadget‘ for finding the CSS selector of a page
element.
Step-4: Click on the ‘SelectorGadget’ icon (at the top right-hand side of the browser window) in order to turn on the extension:

Step-5: Now select the ‘banner ad’ and note down the corresponding CSS Selector, displayed in the
‘selectorGadget’ tool:

In my case, the CSS selector is: .images
Step-6: Turn off the ‘SelectorGadget’ extension by clicking on its icon again (at the top right-hand side of the browser window).
Step-7: Navigate to your GTM account and create a new tag of type ‘Universal Analytics’. Name it
something like ‘Send Book Cover Visibility as an event to GA‘:

Step-8: Create the tag with the following configuration: Create the tag with the following configuration:


Step-9: Create a new trigger of type ‘Element Visibility’ with the following configuration:


Step-10: Save the tag and then preview the container.
Step-11: Navigate to the page: https://www.optimizesmart.com/video-tracking-via-youtube-videotrigger-google-tag-manager/ and then scroll down the page, until you can see the book banner ad.
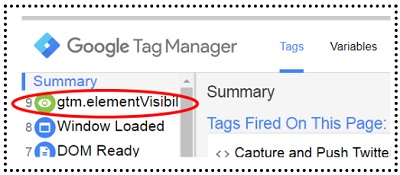
Step-12: Check for the ‘gtm.elementVisibility’ event under ‘Summary’ column in the GTM debug
console window:
Step-13: Click on the ‘gtm.elementVisibility’ event. You should now the see tag ‘Send Book Cover
Visibility as an event to GA‘ being displayed under the ‘Tags fired on this event’ section

We can now conclude that the tag which contains the element visibility trigger is firing.
Step-14: Navigate back to your GTM account and then click on the ‘Leave Preview Mode’ link.
Step-15: Publish your container.
Step-16: Navigate to your Google Analytics reporting view and then click on the ‘Top Events‘ link
(under ‘Behavior‘ > ‘Events’) to see the data for the tracked events:

